
It’s been a hiatus… I’ve been a bit busy lately, it’s summer time and all… I’ve been enjoying the beautiful weather with my family but I feel like I’m due, so here we go!
Home Theatre! This topic interest me big time, ever since I bought my “new” house 5 years ago I had been planning to do something nice in terms of an entertainment space. The space I had in my mind was a bit different then your typical audio/videophile types dream of but it’s what I dream’t of at this stage in my life.
I will be the first to admit that this post is late to the game, and I anticipate to upgrade my projector and receiver to native 4k within the next 6-8 months. I have my eye on you Optoma UHD60!
Coming from my previous house (a shoebox) I had a big room to actually call my mancave, a 25’x16′ room. The picture below is pretty unflattering… and it only shows the room from one angle, but this is all I could find for the time being… This was a couple days after we moved in. In hindsight I should’ve taken more before and after photos for this project.

Here is the original conceptual design of what I envisioned the room to actually become.

First step was to build the A/V closet and shelving, the closet did not exist originally so I had to rip out some drywall and attach into the existing framing. Here is a before picture of where I put the closet in.

Here are some pictures of the AV closet build out. The shelf design I found on another site, if I can find it again I will give them a kudos link, man is it a solid design – homemade shelf that can hold a ton of weight and gear. All of the supplies for the shelf I purchased at Canadian Tire and Rona. All of the cabling, connectors, wall plates and in ceiling speakers I purchased through Monoprice.


Here are pictures of what it looks like today, don’t mind the mess I have a few kids.


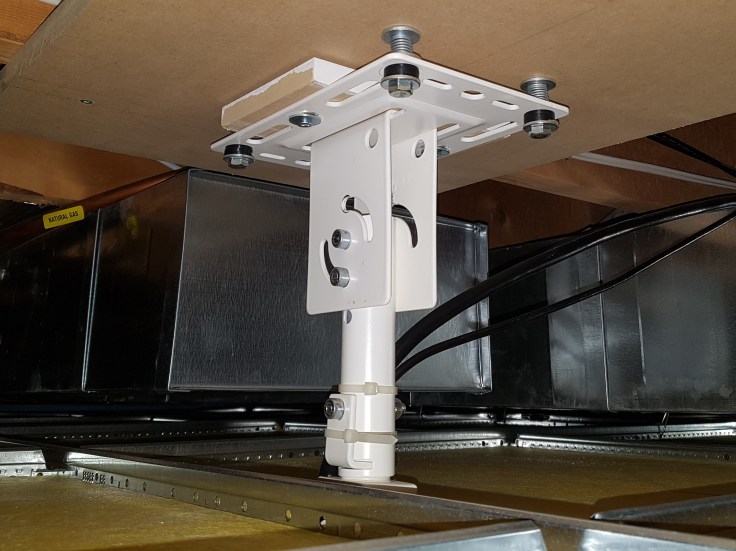
Projector Mount
If you look at the projector mount picture below you’re probably saying wow that’s a crazy mount is this guy a nutcase? Actually it’s pretty much mandatory in my mind to design something like this if the projector is going to be installed in a basement like setting.
When I originally mounted the projector I was truly a newbie… I affixed it directly on the floor joists, what a mistake. The feedback was vicious and the projector was bouncing like no tomorrow… and when it started to bounce it really didn’t recover quickly since there was nothing to absorb the movement that reverberated off the joists.
This is something I came up with through trial and error, this works for me, it doesn’t eliminate movement entirely, if my kids are bouncing off the walls upstairs it will shake, but it’s absorbed quickly by this design and I can rest well knowing that my investment is safe. To date I have almost 5000 lamp hours using this rig and the projector and lamp still lives on.
I used a large piece of MDF that spans three joists, I tapped into the joists using 2 1/2″ wood screws. From there I lined up where the projector was going to be mounted and penciled in four pilot holes where the bolts were going to be installed. These four bolts affix the actual mount to the MDF base, they are 3/8″ in width in my application, the bolts are fairly long I believe around 3 1/2″. I used several washers, rubber grommets and springs as you can see from the photo, these items are doing a lot of the hard work to minimize any vibration and impact.
Projector
At the end of 2012 I was on the hunt for the right projector for me. I didn’t want to spend a ton but I wanted a projector that was a good bang for the buck, but mandatory was good input lag and 3D. I stumbled across the BenQ W1070 Home Theatre DLP Projector. It’s a great unit, I’ve been using it now for almost 5 years, so it’s done really, really well… no issues whatsoever.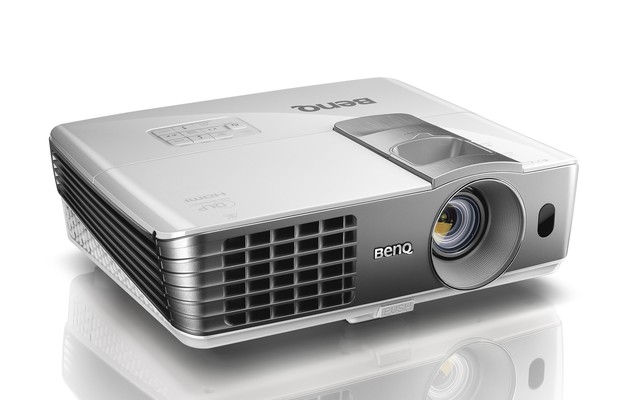
Screen
I went the Do-It-Yourself route. After abundant research I ended up using the following for the screen paint:
Sherwin Williams ProClassic Smooth Enamel Satin Finish Extra White – 6260 UNIQUE GRAY. I don’t believe Sherwin Williams carries this formulation anymore.
Down the line I believe I will switch to an actual screen for my next projector install. Don’t get me wrong the paint is great and a money saver, but I found that it cannot cover imperfections in your actual drywall. If you look close enough you can pick up on these subtle things while the unit is on.
I used a somewhat dark color for the rest of the wall around the screen. Sherwin Williams Classic 99 Satin Finish Extra White – 6549 ASH VIOLET.
The screen is approximately 110″ measured diagonally.
Screen Frame
I used 2 1/2″ MDF trim I mitered the corners at 45 degrees and installed L shaped hinges on the back side. I primed and painted with flat black paint and used brad nailer to affix it to the wall.
Speakers
I opted for a 7.1 configuration, the front and center speakers I got a sweet deal on from Newegg, they were on clearance dirt cheap… I could not pass it up. I picked the JBL Studio 1 Series Studio 190 Front and Center speakers. For the subwoofer I went with the Klipsch KW-100, for the sides I went with Klipsch RS-62s. For the in ceiling I went with Monoprice 6-1/2 Inches Kevlar 2-Way In-Ceiling Speakers.
The in-ceiling speakers I cut a plywood template to hold the speaker since I have a drop ceiling with soft fiberglass tiles. The plywood template fits into the 2’x2′ grid and the grid take the weight of the speaker and not the tile.
For the Klipsch surround speakers, I mounted the speaker to a stud on opposing walls using a single screw.
I am not an audiophile but they sound good to me, most would recommend not mixing and matching, but really for me I was going with the best value/deal at the time as speakers can be really expensive for something better then bottom of the barrel.
AV Receiver
For the receiver I went with the Onkyo TX-NR616, I had never purchased an Onkyo before but I can say I have been really happy with it.
The receiver can not fully power my front speakers in it’s current 7.1 configuration, if I used 5.1 it can power them fully, but the sound is still good, I don’t pump it too often… just something to keep in mind if you are purchasing an AV unit.
The one issue I have had which seems to be some kind of glitch where HDMI switching stops working after the projector is turned off, it doesn’t happen all the time… it is a random thing. Simply recycling power on the receiver corrects the issue.
IR Repeater
For extending my IR remotes (satellite receiver, AV receiver, etc…) I went the cheap route. I picked up a USB powered IR repeater from Amazon – Neoteck IR Repeater Infrared Remote 1 Receiver 4 Emitters Control Kit. I just plugged it into my AV receiver’s USB port to get power, and I installed the IR receiver discreetly along the edge of my drop ceiling. It’s cheap but it does the job and I can close my cabinet if need be and not have to fight with pointing remotes directly at the device.

hi!,I really like your writing so so much! share we be in contact extra approximately your post on AOL? I require an expert on this space to solve my problem. Maybe that is you! Having a look ahead to look you.