
It’s been a while but finally I got around to completing Part 3 of an old series.
Part 1: The NAS build, can be found here.
Part 2: The Setup can be found here.
Part 4: OSMC/KODI/XBMC can be found here.
The whole idea of this was so you could have your media at your finger tips. Your movies, your TV shows and your Music. If you’re like me you have shelves and shelves full of Movies and Television shows, and plastic bins full of CDs.
I’m not condoning piracy, and personally I think you should have control over the media that you own, as long as you don’t distribute it or broadcast it for the masses. Having said this you should probably check with your Country’s copyright laws. Either way it is nice to have it all at your finger tips.
I’m finding less and less compatibility between software and HD DVD movies these days, some titles I am unable to convert into a digital format form HD DVD. Also there is a draw back with HD DVDs, they only support Dolby Digital and DTS audio, where as newer Blu-Ray movies support lossless audio such as Dolby True HD and DTS Master Audio formats. There are a few new ones on the horizon as well, these would be Dolby Atmos, DTS:X and, Auro-3D.
Couple of good sites where you can find a lot of information on ripping and appending videos are http://www.videohelp.com/ and http://www.doom9.org/ .
To rip movies/tv you will require a few pieces of software. Besides the necessary codecs only two, Make MKV and Handbrake. Make MKV strips the copy protection and rips 1:1 video and puts them in MKV containers. Handbrake compresses the videos to specific formats and output devices. These are both free, if you want to pay for a single piece of software I would recommend DVDFab Blu-Ray ripper.
K-Lite Codec Pack is used to decode the material and the different formats for converting the material you will be ripping.
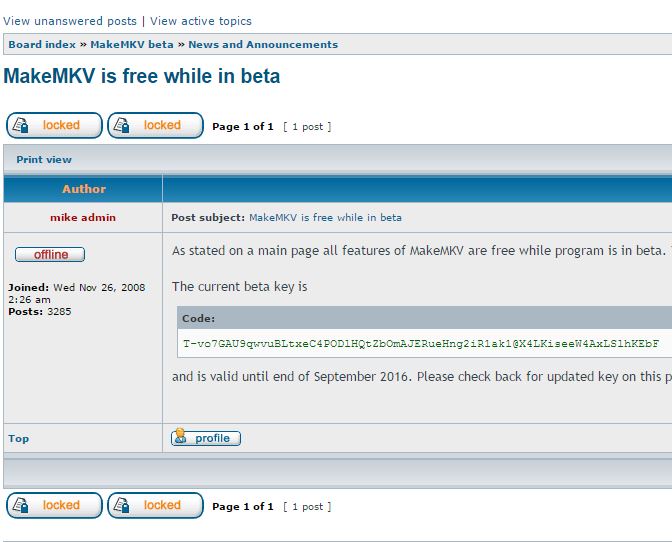
MakeMKV can be used to strip the AACS and BD+ protections from discs, however this software goes a step further and can also convert your Blu-Ray movie to a MKV container. Mind you the movie will be large and there will be no compression, so the files can turn out to be 20GB, great if you want a lossless 1:1 copy of your movies. This software is free while in beta and for full functionality. You must input their beta key in to the software to make if functional, the key can be found here on their forum. This software also allows you to rip 3D Blu-Ray Titles. You can actually get away using only this software for ripping content.

HandBrake requires you to have the disc already ripped and stripped, generally using MakeMKV or Fab Decrypter. I really like using the batch processing mode in HandBrake, it’s very useful for TV shows. Also with handbrake you can create a custom template so it’s nice and easy to work with TV shows or repetitive content. HandBrake is also a converter so it can convert content for portable devices, it can make the file sizes smaller and change the resolution of the source, etc.

DVDFab HD Decrypter is used to copy movies into a file and remove the encryption on the disc. This will remove AACS and BD+ protection. This software is free and usually the first step to digitizing your library, uless you are using MakeMKV. Be aware though, some software is not able to create Rips from these backups there is something specific to this software that sometimes does not play well with other applications.
DVDFab Blu-Ray Ripper (3D Plus), I use this software to rip my 3D Bly-Rays. This software allows the movies to be ripped into a 3D half side by side MKV or a 3D half over under MKV file. It’s paid software, but worth the money. Having said this there are other options for ripping 3D movies, MakeMKV can do it as well. Nice thing about this application is that you can compress the file and there is no need for a 1:1 copy.
Pavtube ByteCopy, I’ve actually never used this software but in my research I found that people have good things to say about the software.
BDtoAVCHD is another tool that came to my attention recently, If you ever want to create discs from your ripped content this is the tool to use.
So now that you have the necessary software where do you go from here?
Note that if you are looking for menus etc, this is not the guide for you. I don’t really care for the extra content and only want Audio track/Subtitle options. Mind you with Make MKV you are able to rip the special content as well, but I reiterate there is no menu system. Also I will only cover the Make MKV how to here, the DVDFab method is a paid method and kind of an all in one package that is simple to use, so no need to get into the details of that.
Download, install, and get the beta Make MKV key from the forum. The key changes with each Beta release, and even though MakeMKV is in version 1.x it is still free/considered beta.
Once you install the software start up Make MKV and input the key in Help > Register. If you like the software and want to purchase it go to Help > Purchase. 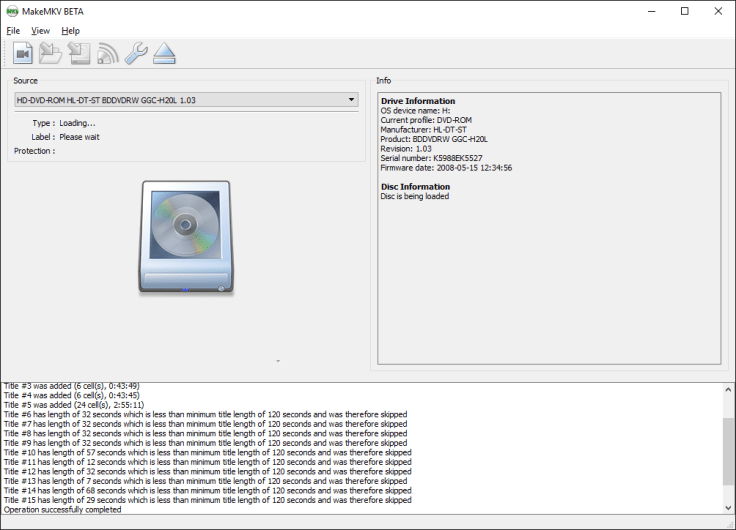
Insert the disc with the material you want to rip, make sure you have the right optical drive selected in the drop down list, then press the Open Disc icon in the left pane of the application window. The icon looks like a DVD drive with a disc inside. Alternatively you can go to File > Open Disc and select the appropriate optical drive where your disc is. 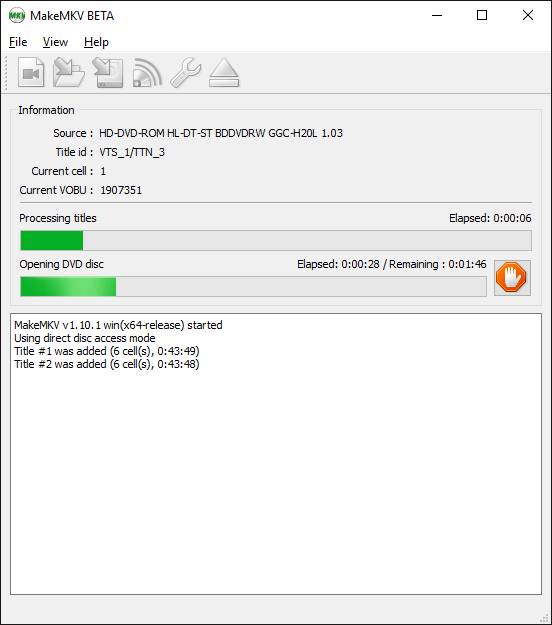
The icon will start to look like it’s spinning and the software will take a minute to read and decrypt the disc in the drive. Once this process completes you will be presented with a list of valid Video sources on the disc. Generally the large ones are the content that you want.
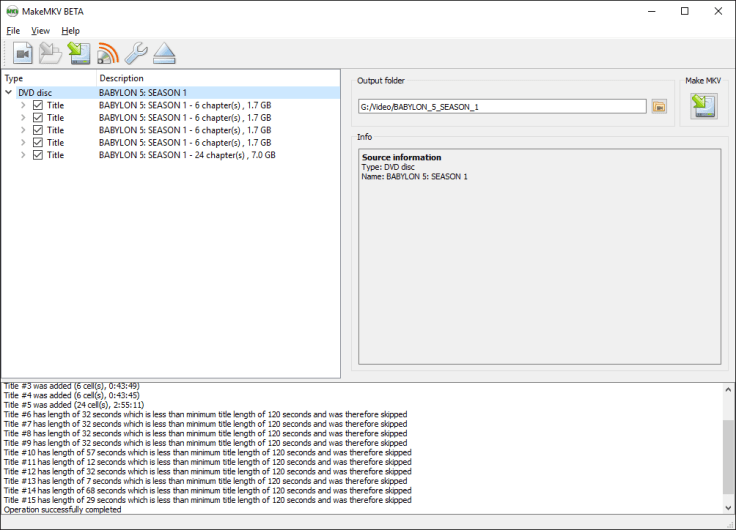
Note that with this particular disc you have 4 episodes/Titles and that the 5th 7.0GB file is all of the episodes in one seamless Title. When I was converting this I generally skipped this one Title. Select the titles you wish to rip. Change the output folder on the right side of the window to where you want to save the converted files to. Then click the Make MKV button to the right of that. Depending on the processing prowess of your PC this can take a bit, it will also prompt you to create the folder if it does not exist. 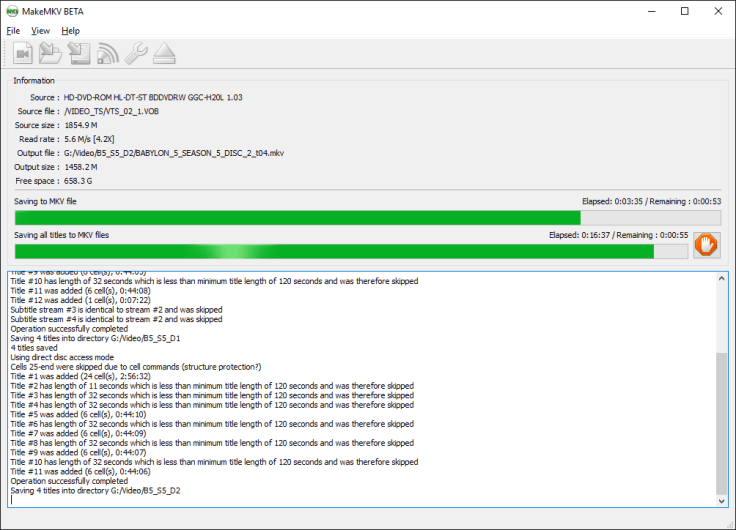
Once the process completes go into the folder and rename the files to something meaningful.
Once you have your MKV, you can start to compress and convert the formats.
To do this use Handbrake, it has several presets available for you to use. However if you wish you can create your own and save it. This is where you can take 1080p content and convert it to 720p, having said this this will take a long time if you have a slower computer.

You select your source which is either a file or a folder, and you can set your resolution in the Picture tab. Notice the output settings, you can change them to MKV or MP4 in this example. This is something to keep in mind.
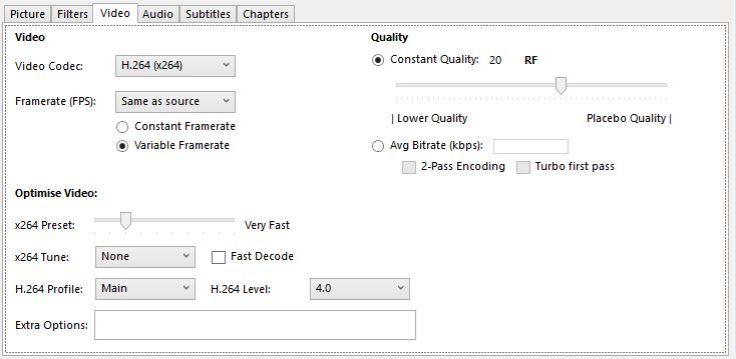
In the Video tab you can change the codec that the encoder will use to recode your video in, H.265 is an option, select the Quality and you can even do 2-Pass Encoding. While 2-Pass encoding does improve the quality you will be looking at a really long encode unless you have lots of RAM and a really fast processor.

Then you have your Audio section where you can downmix to stereo or upmix to a different codec all together. Note that you can have multiple audio tracks.
Once you have selected your desired settings you can save them as to use at a later time, just click the ADD button on the bottom right. If you have multiple videos to encode add them to the queue and keep going, nice thing about Handbrake is that it does batch conversions.
