
This is going to be somewhat backwards, I will follow this up with a creating an OpenVPN server post at a later time.

Be aware that this client will be setup in AWS so there will be AWS references in the article. This can be easily translated to your own network.
A prerequisite for this is a OpenVPN server at a remote location that is not in AWS, your office for example.
Spin up an ami, preferably CentOS you can use the Amazon Linux AMI as well as it is built from the same meat and potatoes.
I used an ami with the ID of ami-033e6106180a626d0 this is a CentOS linux ami.
Make sure your instance has an elastic IP and it can be reached externally via SSH.
Always work with sudo, I use the sudo -i command to accomplish this.
*Note the service on the OpenVPN client is called openvpn-client@aws.service
Configure your OpenVPN server for the Client
You will need to do two things, assign the client a static IP when it connects to the VPN,
and advertise the subnets that sit behind the VPN client.
SSH into your Server instance.
Work as sudo, create a CCD directory, and a client file.
sudo -i
mkdir /etc/openvpn/ccd
cd /etc/openvpn/ccd
touch myuser
Edit the myuser file and add the following.
ifconfig-push 10.8.1.254 255.255.255.0
iroute 172.31.1.0 255.255.255.0
push "route 172.31.1.0 255.255.255.0 10.8.1.254"
push "redirect-gateway def1"
route 172.31.1.0 255.255.255.0 10.8.1.254
*Note that the file name myuser in this directory should reflect the user id that the AWS client will connect with and it should be unique.
This OpenVPN server configuration uses only one set of certificate files, but I created a unique LDAP user ID called myuser
that only this server connects with. This is defined by the server configuration line username-as-common-name each time an LDAP user connects
instead of the certificate name it will be identified as the LDAP user ID.
As such anytime myuser connects it is assigned a static IP of 10.8.1.254 as defined by the ifcongif-push line as defined in the myuser file.
The iroute 172.31.1.0 255.255.255.0 advertises the AWS subnet that sits behind the AWS client.
You also don’t need the last 3 lines, especially push “redirect-gateway def1” only add that if you want to redirect all gateway traffic from AWS via the VPN. The other 2 are redundant as those routes are pushed and advertised via iroute and the entries below so either or. Navigate to the open vpn directory /etc/openvpn and edit the server.conf file and add the following.
push "route 172.31.1.0 255.255.255.0"
client-config-dir ccd
route 172.31.1.0 255.255.255.0
route 10.8.1.254 255.255.255.0
The above advertises the new route to all the clients that connect and tells the clients the configuration directory is ccd.
ipp.txt does not work for pushing static IPs as such we use the ccd directory here.
route 172.31…in this file in conjunction with the iroute 172 in the myuser file direct all traffic to said client.
route 10.8…in this file in conjunction with ifconfig-push 10.8 in the myuser file assign a static IP to the myuser client.
Install and configure OpenVPN on the client.
Use your key and remote into the client Linux instance. Work with sudo
sudo -i
Update your instance
yum update -y
Install enterprise linux repository (EPEL)
yum install epel-release -y
Update your repository again
yum update -y
Install open vpn and wget
yum install -y openvpn
Create a client directory in the OpenVPN directory and move into it.
mkdir /etc/openvpn/client
cd /etc/openvpn/client
Create two configuration files.
touch aws.conf
touch login.conf
Edit the login.conf with your user id and password. First line is the user id and the second line is your OPEN VPN password.
nano login.conf
The file should look like this.
myuser
MyP@sswerd$
Save and exit the file.
Edit the aws.conf file using nano.
The file should look something like this.
client
dev tun
cipher AES-256-CBC
tls-client
tls-auth ta.key 1
remote-cert-tls server
auth-user-pass /etc/openvpn/client/login.conf
keepalive 10 60
proto udp
remote vpn.mydomain.com 1194 udp
topology subnet
pull
persist-tun
persist-key
user nobody
group nobody
verb 3
<ca>
-----BEGIN CERTIFICATE-----
-----END CERTIFICATE-----
</ca>
<cert>
-----BEGIN CERTIFICATE-----

-----END CERTIFICATE-----
</cert>
<key>

-----BEGIN PRIVATE KEY-----
-----END PRIVATE KEY-----

</key>
<tls-auth>
-----BEGIN OpenVPN Static key V1-----
-----END OpenVPN Static key V1-----
</tls-auth>
Obviously add your own certificates to the aws.configuration file. Save the file and exit.
I include my certificates in the configuration file.
You don’t have to, you can move them somewhere else and reference them in the configuration file.
Also note that aws.conf will be the name of the service, you can name the file whatever you would like but then you have to reflect this in the configuration of the service.
IP Forwarding on the Client
Next you need to configure IP forwarding on the client as you do on the Server. Without this the bridging will not work.
First check and make sure your firewall is disabled on the AMI, generally they are by default.
systemctl status firewalld
If it’s disabled, move on, otherwise do the follwing.
systemctl stop firewalld
systemctl disable firewalld
Next enable IP forwarding.
nano /etc/sysctl.conf
Add the following line to the conf file.
net.ipv4.ip_forward = 1
Restart the network service.
systemctl restart network
Test your open vpn connection. If it is working disconnect and move on to the next step.
openvpn --config aws.conf
Create an OpenVPN service on the Client.
Next you will create an open VPN service which will restart and reconnect if it crashes.
Last thing you want is the tunnel crashing and not coming back up.
Create the service.
systemctl ebnable openvpn-client@aws.service
Note that the client portion between the openvpn and @ symobol is the client directory we created earlier, and the aws after the @ is the aws.conf file we created.
This will create the service.
Next start the service and check the status.
systemctl start openvpn-client@aws.service
systemctl status openvpn-client@aws.service
The status should spit out the following.
● openvpn-client@aws.service - OpenVPN tunnel for aws
Loaded: loaded (/usr/lib/systemd/system/openvpn-client@.service; enabled; vendor preset: disabled)
Active: active (running) since Thu 2019-06-06 17:03:54 UTC; 1h 7min ago
Docs: man:openvpn(8)
https://community.openvpn.net/openvpn/wiki/Openvpn24ManPage
https://community.openvpn.net/openvpn/wiki/HOWTO
Main PID: 4209 (openvpn)
Status: "Initialization Sequence Completed"
CGroup: /system.slice/system-openvpn\x2dclient.slice/openvpn-client@aws.service
└─4209 /usr/sbin/openvpn --suppress-timestamps --nobind --config aws.conf

Jun 06 18:03:54 ip-172-31-1-81.ca-central-1.compute.internal openvpn[4209]: TLS: soft reset sec=0 bytes=82353/-1 pkts=1140/0
Jun 06 18:03:54 ip-172-31-1-81.ca-central-1.compute.internal openvpn[4209]: VERIFY OK: depth=1, C=CA, ST=AB, L=Edmonton, O=Some Company, OU=IT, CN=domain.com, name=server, emailAddress=admin@domain.com
Jun 06 18:03:54 ip-172-31-1-81.ca-central-1.compute.internal openvpn[4209]: VERIFY KU OK
Jun 06 18:03:54 ip-172-31-1-81.ca-central-1.compute.internal openvpn[4209]: Validating certificate extended key usage
Jun 06 18:03:54 ip-172-31-1-81.ca-central-1.compute.internal openvpn[4209]: ++ Certificate has EKU (str) TLS Web Server Authentication, expects TLS Web Server Authentication
Jun 06 18:03:54 ip-172-31-1-81.ca-central-1.compute.internal openvpn[4209]: VERIFY EKU OK
Jun 06 18:03:54 ip-172-31-1-81.ca-central-1.compute.internal openvpn[4209]: VERIFY OK: depth=0, C=CA, ST=AB, L=Edmonton, O=Some Company, OU=IT, CN=domain.com, name=server, emailAddress=admin@domain.com
Jun 06 18:03:54 ip-172-31-1-81.ca-central-1.compute.internal openvpn[4209]: Outgoing Data Channel: Cipher 'AES-256-GCM' initialized with 256 bit key
Jun 06 18:03:54 ip-172-31-1-81.ca-central-1.compute.internal openvpn[4209]: Incoming Data Channel: Cipher 'AES-256-GCM' initialized with 256 bit key
Jun 06 18:03:54 ip-172-31-1-81.ca-central-1.compute.internal openvpn[4209]: Control Channel: TLSv1.2, cipher TLSv1/SSLv3 ECDHE-RSA-AES256-GCM-SHA384, 4096 bit RSA
Now we need to make sure that this service starts automatically when the server reboots or the tunnel crashes.
Check to see if the service is enabled to auto start.
systemctl is-enabled openvpn-client@aws.service
If you get the following that means the service will auto start.
[root@ip-172-31-1-81 /]# systemctl is-enabled openvpn-client@aws.service

enabled
Otherwise do the following.
Open the openvpn service.
nano /etc/systemd/system/multi-user.target.wants/openvpn-client\@aws.service
Under the [Service] heading add the line Restart=always
[Unit]

....

[Service]

...

Restart=always

[Install]

...
Test the service to see if it restarts by either rebooting the AMI or do the following.
Check the PID of the process, kill it, and see if it restarts.
systemctl status openvpn-client@aws.service
Should see something along the lines of….
Main PID: 4209 (openvpn)
Kill the process to see if it restarts
kill -9 4209
If you do a status again the process should have a new PID.
That’s it, now don’t forget to add your routes to the Networking side of things. Your gateway on the Server side needs to know how to get to the AWS client and it’s networks.
If you are putting this in AWS, rememeber to add the routes in the Route table and make changes to the security group as well. Traffic needs to flow both ways.
AWS Route Table Changes
In AWS find the VPN that the AWS client lives in and locate the route table for said Subnet.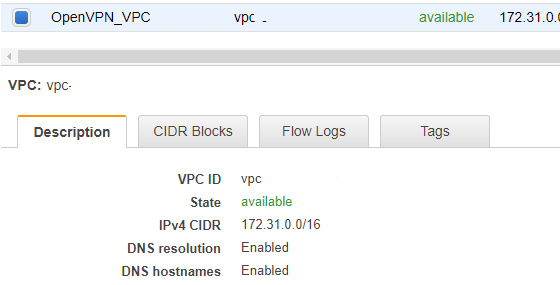
In this case its called OpenVPN_RT
Click on this route table. 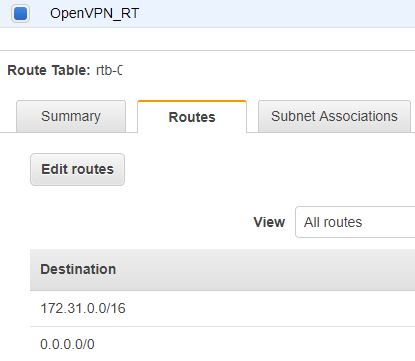
Then Edit the route.
Click Add route… then type in the CIDR block of the Network in your remote location, the network that sits behind the VPN server.Select instance and select the AWS Client VPN instance that you have created.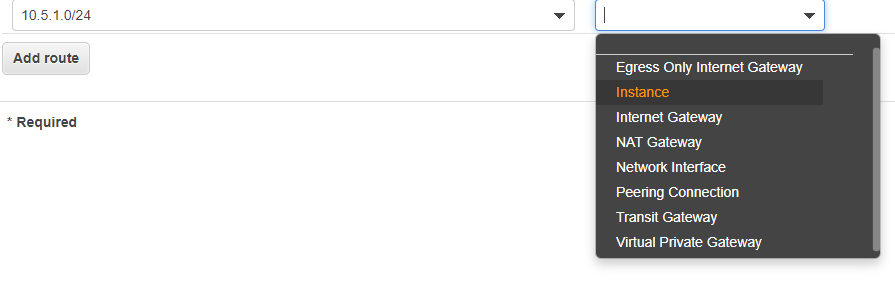
This will translate the route to the instances Network Interface once you click save routes.
Do the same for the VPN CIDR and any other CIDRs that live behind the VPN Server.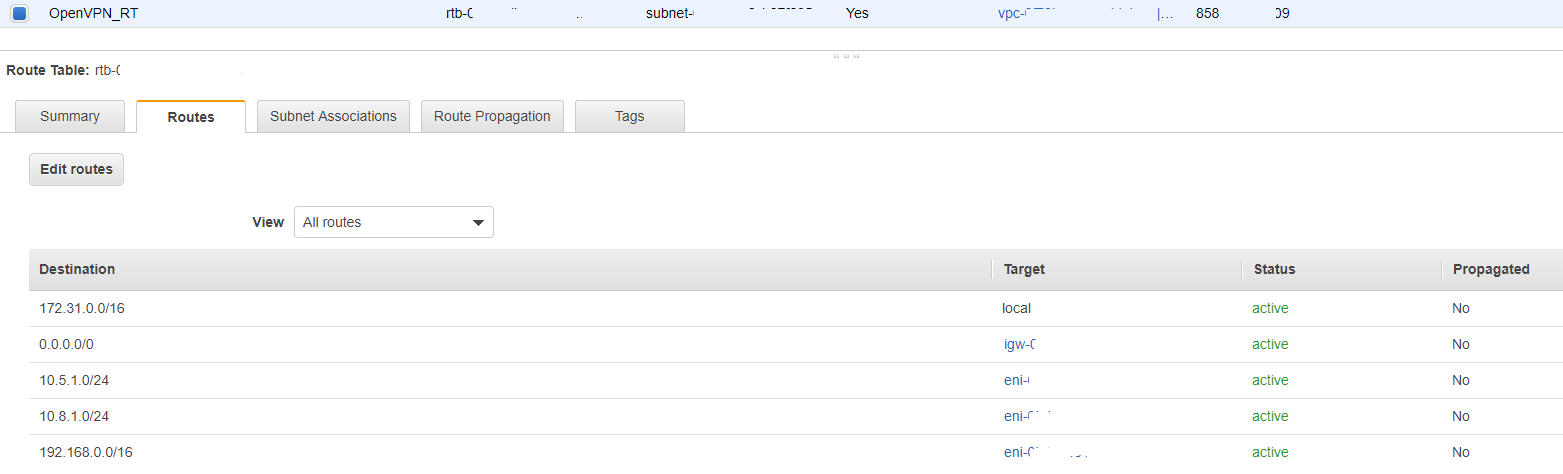
Your security group should look like this.
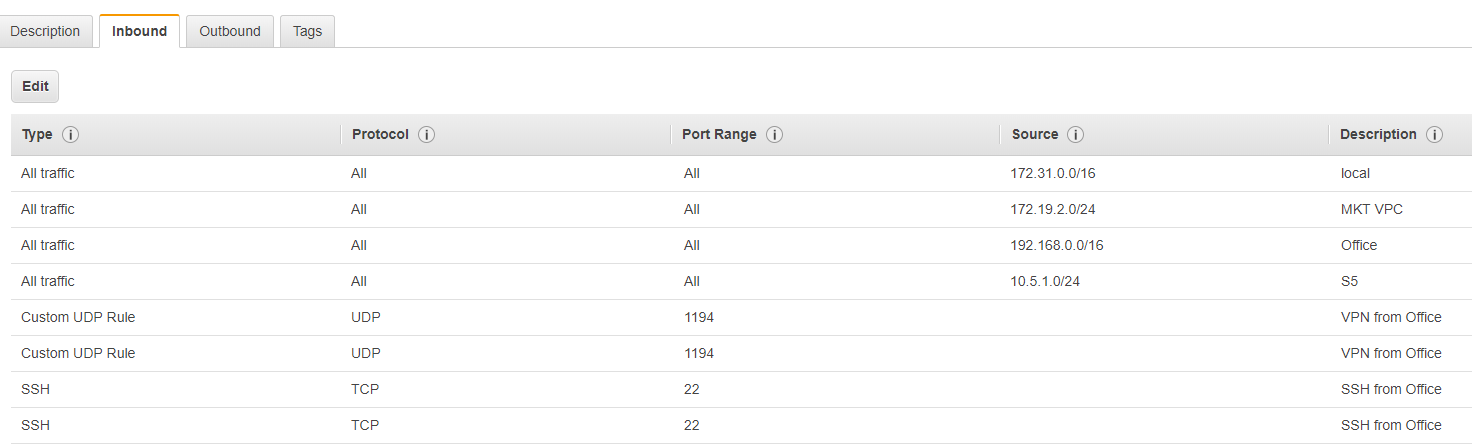
Note the SSH entries, they were added in order to initially setup the linux boxes.
If your traffic is routing properly you can remove these last two entries as these are no longer needed and you can reach the AMIs via the AWS subnet IP.
Ignore the MKT VPC entry this is used for a peering connection.
PROFIT!
Resources:

Leave a comment